3D Modelling and Tracking of a Building

For this clip i was inspired by shots included in films where a bomb would land on a building. I decided i wanted to do something similar but not with a bomb as i felt my knowledge of Matchmover and Maya wasn’t advanced enough to create a bomb along with an explosion and debris. So instead i decided it would be different to create a sort of blanket or table-cloth to fall onto a building.

With the use of Matchmover, i tracked all the points of a panning shot of a building on Portland. I then had to take that file into Maya and construct a sort of shell of the building and where all the ledges are etc to give the programme an idea of where the cloth should be dropping and where the shadows should be appearing.

Then i had to create the cloth and i applied a colourful checkerboard design to it. There is also a camera view involved in the video as in the perspective view the construction of the building is visible.

After this i had to render all of the frames out into images which took a very long time. Eventually it had finished rendering and i was able to import all of the images into Adobe Premiere Pro CS6. I had to lower the minimum frame value of stills in the properties to easily create the video without resizing every still, considering there is around 300 of them.

I don’t have a breakdown/any screenshots of the project at the moment i will update this later.

The final video is below.

I am satisfied with the final outcome of the video clip but there are parts i am not as happy with for example there is a small ball in the frames that flies down vertically against the building I believe this is a tracking point and I was under the impression it would be invisible but it is not and I would try my best to change this if I could redo it. Also there are some edges visible and have some shadow around the construction of the building I made, I am not sure why they are visible as I could not see them when i did pre-renders.Soi would need to find out why they are there and how to change that if I wanted to change the clip. I have also noticed that the cloth doesn’t fall where it should on the ground when it gets to the bottom of the frame, I thought I had rectified this and made it so it drops where it should but for some reason it drops where the steps are so I would need to change this if i had to redo it as well.

Cinemagraph idea

I have found inspiration in the art of cinemagraphs from Ann Street Studio’s website. The cinemagraph i was inspired by is below. The website link for this cinemagraph is http://annstreetstudio.com/2012/01/11/hookah-by-fire-light-puma-takes-us-on-a-desert/.

I have decided i want to make my own cinemagraph and have come up with a few ideas.

6680460661_05b320c8da_o

The first idea i had inspired by the above would be to create a cinemagraph of my dog sitting in front of a fireplace and the fire roaring behind him.

To do this, i would need to take a photo of my dog by the fire and capture a video of the fire roaring and my dog sitting there. I would then need to mask in the fire roaring into the photograph. I used two video tutorials to make my cinema graph.

I used Adobe Photoshop CS6 and After Effects CS6 to mask and separate the video into layers by rasterising it. I also slowed down the fire roaring as i felt it was too fast and it would look more realistic if it was slower. The GIF is also colour graded with curves and levels to make it look less red toned. I also removed some grain. I am not sure why but the video and photographs i took were slightly grainy, the only reason i can put this down to is that the lighting was not great so in the future i am going to make sure i used external lighting in my projects.

grain and mask

(Details of the remove grain i used and the mask i drew)

levels curves

(The curves and levels effect settings i used).

The final cinema graph i created is below.

Untitled-3

I am very happy with the results. I am only unhappy with the low quality of the GIF. I tried to find different ways to resolve this but it seemed like there is not much you can do about it.

Sahara

For our current assignment we are to make 5 clips which include our own visual effect content for our future showreels. We are to include : Greenscreen, set extension, 3D modeling, 2D and 3D camera tracking, compositing, and colour grading.

I was researching green screen techniques and found that the film ‘The Great Gatbsy’ had some great scenes where green screen was used by the visual effects company Rising Sun Pictures, i was inspired simpy the scene of Mr Gatsby raising a glass with fireworks going off behind him. It inspired me to make a scene where someone would be infront of a different background. This is where my idea came from to make Dan look like he was in Sahara Dessert with the wind flowing through his hair.

I have linked the video and screenshotted the scene i am referring to below :

Untitled-1

(Video Here)

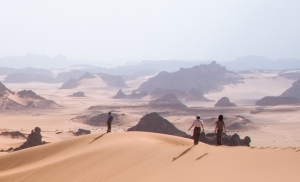
For my first clip I am using the techniques of green screen and set extension. The clip consists of my classmate Dan walking on sand dunes in the Sahara. The clip was filmed in the TV studio with a greenscreen background and an assistant to ‘flap’ a piece of cardboard as if the wind was hitting his hair. For this clip I used Adobe After Effects CS6 and Adobe Photoshop CS6.  Before I chroma keyed the footage I had to Photoshop the background to get rid of some people in the background otherwise you would be able to see errors with proportions of them to Dan.

Here is an image of the original and the people in the background gone. peopleno people screenshot2

The screenshot above shows what the image & video clip of Dan looked like once it was chromakeyed onto the background. I then found there was part of the video clip which looked odd around his top and discovered it was because there is some green on his t-shirt.

screenshot

To get rid of the funny parts around his t-shirt I had to mask it for each movement in the video clip to make it so the chromakey does not affect the colours in his t-shirt.  Once I had finished the chroma keying and masking, I needed to colour correct the scene to make it as though Dan was definitely in the Sahara, for this I used curves, brightness and contrast, colour balance, levels and i also added grain. I then added a vignette effect around the edges to make the clip slightly more ‘older’ looking. The video below is a breakdown of the clip i made.

<p><a href=”http://vimeo.com/111724923″>Sahara Breakdown</a> from <a href=”http://vimeo.com/user5630482″>Christina Vincent</a> on <a href=”https://vimeo.com”>Vimeo</a&gt;.</p>